Updated September, 2026
Starting Honkai: Star Rail for the first time can be exciting, although the game introduces a surprisingly large number of systems within the first few hours. Characters have different Paths and Combat Types, battles revolve around Skill Points and Energy, and progression eventually expands into Light Cones, Traces, Relics, Planar Ornaments, Warp banners, and several different currencies.
Fortunately, you do not need to understand everything immediately. Most systems become easier once you understand what purpose they serve and how they connect to the rest of the game, allowing you to learn more advanced mechanics naturally as your account develops.
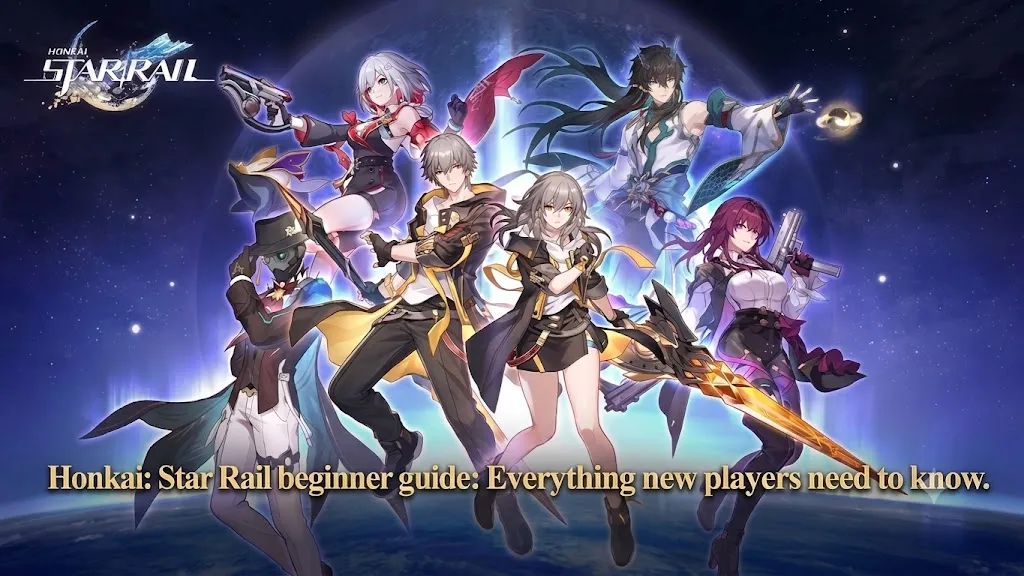
This Honkai: Star Rail beginner guide focuses on the fundamentals that matter most when starting. It explains how combat works, what Paths and Combat Types mean, how to approach your first team, which characters and upgrades to prioritise, how equipment works, how to use Stellar Jade and Trailblaze Power, and what to expect as your account progresses.
What is Honkai: Star Rail?
Honkai: Star Rail is a turn-based RPG developed by HoYoverse that follows the journey of the Trailblazer and the Astral Express as they travel between different worlds. Along the way, the story introduces new characters, civilisations, factions, and conflicts connected to the mysterious Stellaron.
Unlike an action RPG where characters are controlled directly in real time, combat in HSR revolves around turn order, resource management, ability timing, and team synergy. Each character brings a unique kit to the team, giving players plenty of room to experiment with different combinations as they progress.
The game is primarily PvE, so progression does not require direct competition against other players. Whether your main interest is following the story, collecting characters, experimenting with different teams, or eventually tackling challenging endgame content, you can develop your account at your own pace.
Honkai: Star Rail: Beginner guide to combat
Although Honkai: Star Rail uses turn-based combat, battles involve considerably more decision-making than simply selecting an attack whenever a character gets a turn. Your choices can affect Skill Points, Energy, buffs, debuffs, enemy Toughness, and the order in which characters and enemies act, so understanding how these systems interact becomes increasingly important as encounters become more difficult.
A standard team contains four characters, while their actions are primarily determined by Speed (SPD) and can also be influenced by effects that advance or delay actions. When a character’s turn arrives, you choose the ability that best fits the current situation rather than necessarily using the same action every turn.
Basic ATK
Basic ATK is the character’s standard attack and generally deals less damage than a Skill, but it normally generates Skill Points. Because those Skill Points are shared across the entire team, Basic ATKs are an important part of the team’s overall resource economy rather than simply being weaker attacks.
Skill
A Skill is usually more powerful or specialised than a Basic ATK, although it normally consumes Skill Points. Some characters gain significant value from using their Skills frequently, while others can alternate between Skills and Basic ATKs depending on what the rest of the team requires.
Ultimate
An Ultimate is a powerful ability that becomes available after the character accumulates enough Energy. Once ready, an Ultimate can generally be activated outside the character’s normal turn, allowing you to use it at a strategically useful moment instead of waiting for that character’s next action.
Talent
A Talent is a character-specific passive or mechanic that forms an important part of their overall kit. Because Talents can work very differently from one character to another, reading the description is often necessary when learning how a particular character is intended to function.
Technique
A Technique can generally be used outside the normal turn sequence, often before entering combat, and may provide an immediate advantage such as damage, a buff, or another character-specific effect.
Skill points and energy
Skill Points are shared across the entire four-character team, creating an important resource-management layer because one character’s Skill usage can affect what the other three characters are able to do.
A character who can comfortably rely on Basic ATKs during certain turns may help generate the Skill Points required by a teammate whose abilities demand them more frequently. Conversely, a team in which several characters constantly consume Skill Points can run into resource problems if its rotation is not managed carefully.
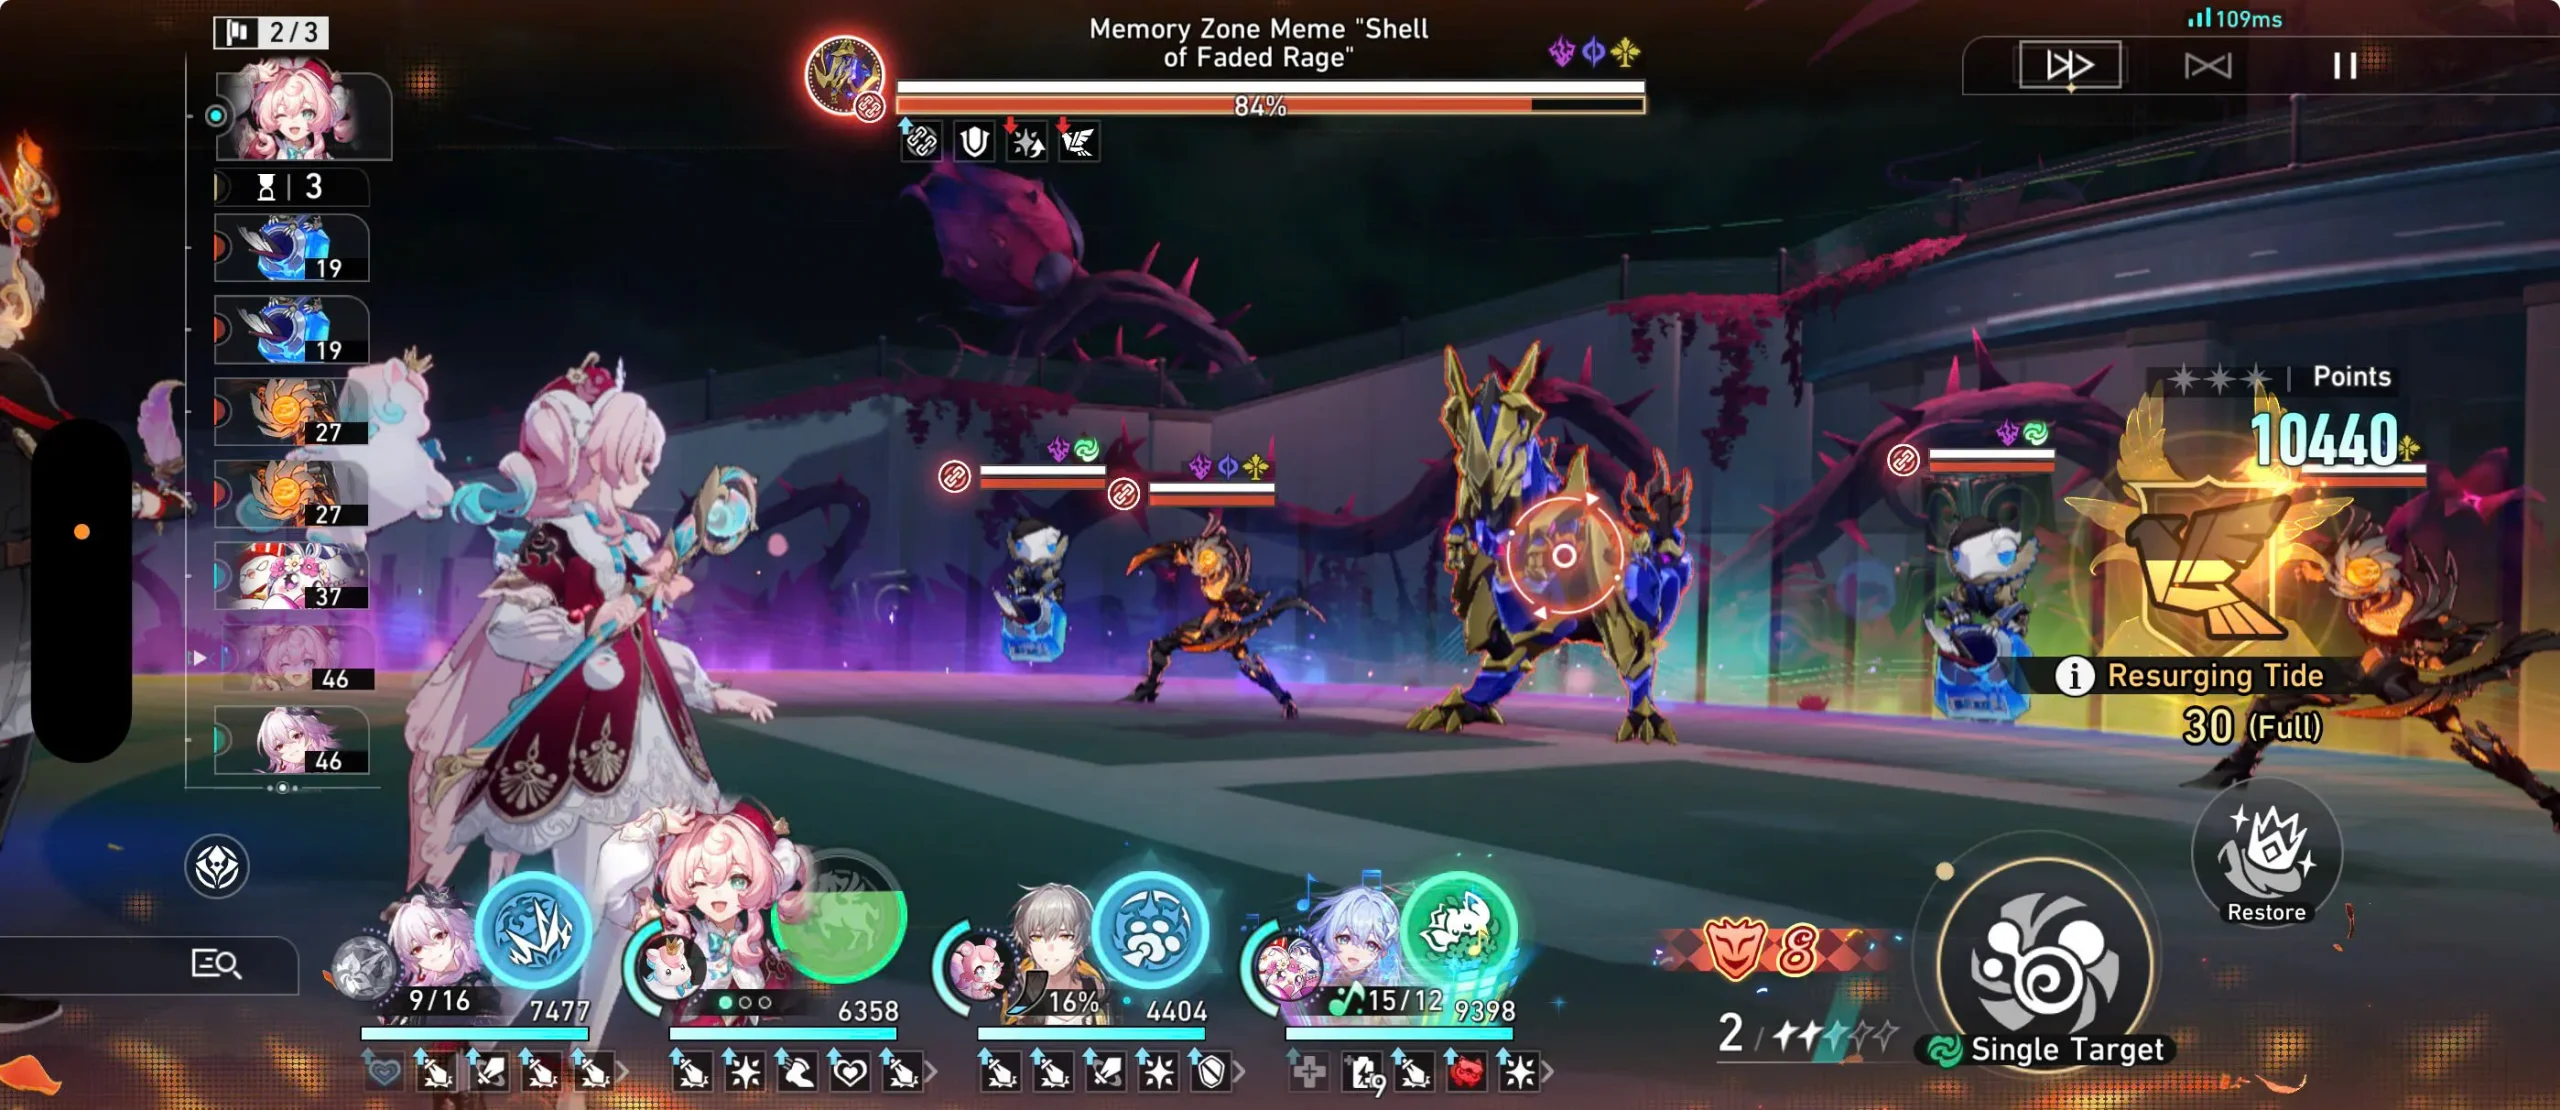
Energy works differently because each character has their own Energy requirement, which is gradually filled through combat actions and other effects. When an Ultimate becomes ready, you can generally activate it immediately rather than waiting for the character’s normal turn, making Energy management closely connected to timing and combat strategy.
For beginners, the most important distinction is simple: Skill Points are a shared team resource, while Energy belongs to individual characters.
Understanding enemy weaknesses
Enemy Weaknesses are another fundamental part of combat because they determine which Combat Types can reduce an enemy’s Toughness.
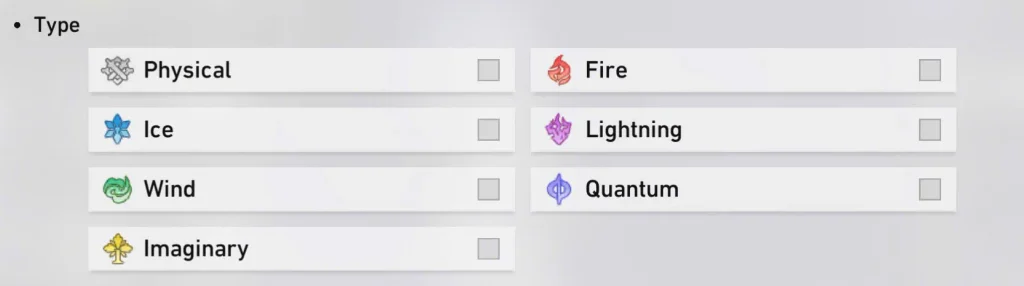
The seven Combat Types currently used by the game are Physical, Fire, Ice, Lightning, Wind, Quantum, and Imaginary.
Because different enemies can have different Weaknesses, checking enemy information before a difficult encounter can help you choose more suitable characters. You do not need to memorise every Break interaction when starting; developing the habit of checking enemy Weaknesses is already enough to give you a useful advantage during early progression.
Paths and combat types clarified
When you attack an enemy using a Combat Type that matches one of its listed Weaknesses, the enemy’s Toughness is reduced. Once Toughness reaches zero, the enemy enters a Weakness Broken state and suffers the Break effect associated with the Combat Type that depleted its Toughness.
Every character is associated with a Path, which broadly indicates their gameplay identity and the mechanics their kit interacts with. The original Paths generally provide a useful indication of a character’s combat role, while newer Paths such as Remembrance and Elation are more strongly defined by their specialised mechanics.
| Path | General Purpose |
|---|---|
| Destruction | Strong and versatile offensive gameplay |
| Hunt | Primarily focused on single-target damage |
| Erudition | Specialises in multi-target and AoE damage |
| Harmony | Provides buffs and team support |
| Nihility | Uses debuffs and offensive utility |
| Preservation | Provides defensive protection |
| Abundance | Provides healing and sustain |
| Remembrance | Uses specialised mechanics involving memosprites |
| Elation | Uses specialised mechanics built around Elation effects and character-specific interactions |
These descriptions are useful starting points rather than complete definitions, since a character’s actual role depends on their abilities, mechanics, and the team in which they are used.
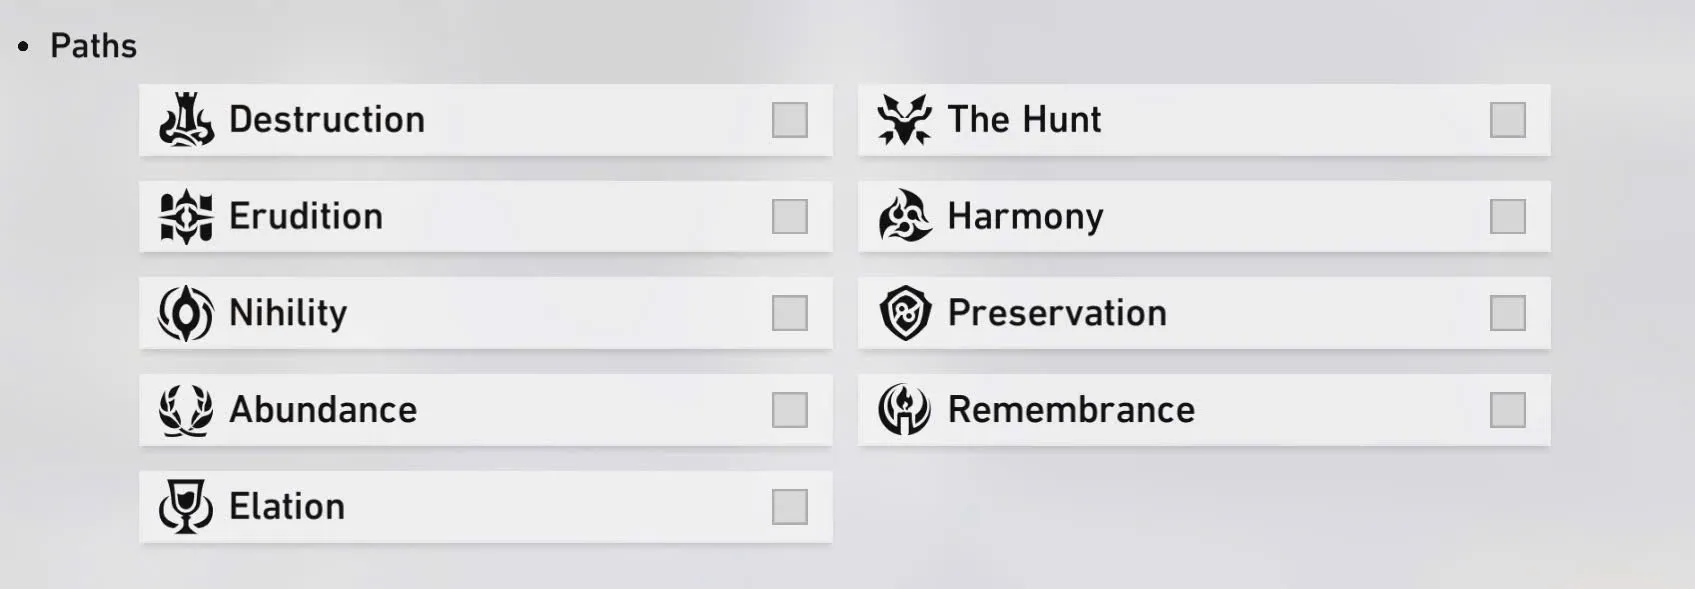
March 7th is a useful example because she has different forms associated with different Paths, including Preservation and The Hunt. Her different forms demonstrate why Path is better understood as a gameplay identity than as a permanent class that defines every version of a character.
The other defining characteristic is the character’s Combat Type, which describes the type of damage they deal and determines which enemy Weaknesses they can exploit. A useful way to remember the distinction is:
Path describes a character’s gameplay identity, while Combat Type determines their damage type and interaction with enemy Weaknesses.
Building your first team
Once you have several characters available, the next step is deciding how to combine them into a team that can consistently handle the content you are currently playing.
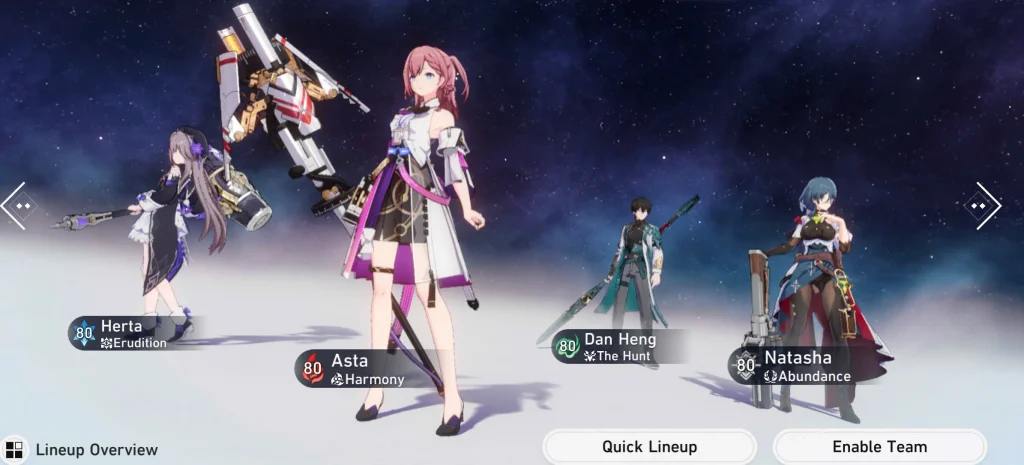
A straightforward starting structure is Damage Dealer + Support + Sustain + Flexible Slot, although this should be treated as a useful framework rather than a mandatory formula. The fourth position can become another damage dealer in a dual-DPS composition, another support in a buff-focused team, a debuffer that complements the main damage dealer, or a specialised character whose mechanics change how the entire composition operates.
The most important concept is team synergy. Characters should ideally contribute toward the same overall game plan, whether that means strengthening one main damage dealer, enabling a particular mechanic, maintaining buffs and debuffs, or generating enough resources for the team’s rotation to function smoothly.
As a result, four individually strong characters do not necessarily make a strong team. A composition becomes much more effective when its members’ abilities complement rather than compete with one another.
How to decide which characters to build
As your roster expands, the more important question is which characters are worth investing in first, since different characters can fill very different roles and resource requirements.
Start by considering what each character actually contributes and whether that contribution fills a gap in your current roster. A character who fills a gap in your roster may be more useful than one whose role you already have covered, particularly when resources are limited.
You should also consider how demanding the character is to play. Some characters rely heavily on frequent Skill usage, specific buffs, particular stats, or carefully managed rotations, while others can provide useful results with a simpler game plan. Neither approach is inherently better for a beginner; the more important question is whether the character fits the way you want to play.
Early characters such as Trailblazer, March 7th, Dan Heng, Asta, Herta, and other accessible characters can help you learn different aspects of team building without requiring a highly specialised roster.
Asta is a four-star Fire / Harmony character, while Herta is a four-star Ice / Erudition character. These characters therefore provide useful examples of how different Paths and Combat Types can contribute to a developing team.
As your account expands, your first team does not need to remain unchanged. New characters can naturally replace existing members when their mechanics provide better synergy with the teams or playstyles you want to explore.
Character progression: What should you upgrade?
Character progression can initially seem complicated because several systems contribute to a character’s overall power. However, the basic priorities become much easier to understand once you separate these systems by their individual functions.
Character Level and Ascension
A character’s Level provides the foundation for their stats and determines how far their basic progression can advance. Reaching higher level caps requires Ascension, which also unlocks additional progression and helps actively used characters remain competitive with the content you are currently clearing.
Once a character reaches their current level cap, Ascension is often a more valuable next step than immediately searching for stronger equipment. Keeping your main characters appropriately levelled also makes it easier to progress through the content available at your current stage of the game.
Traces
Traces improve individual abilities and passive effects, although not every Trace contributes equally to a character’s performance.
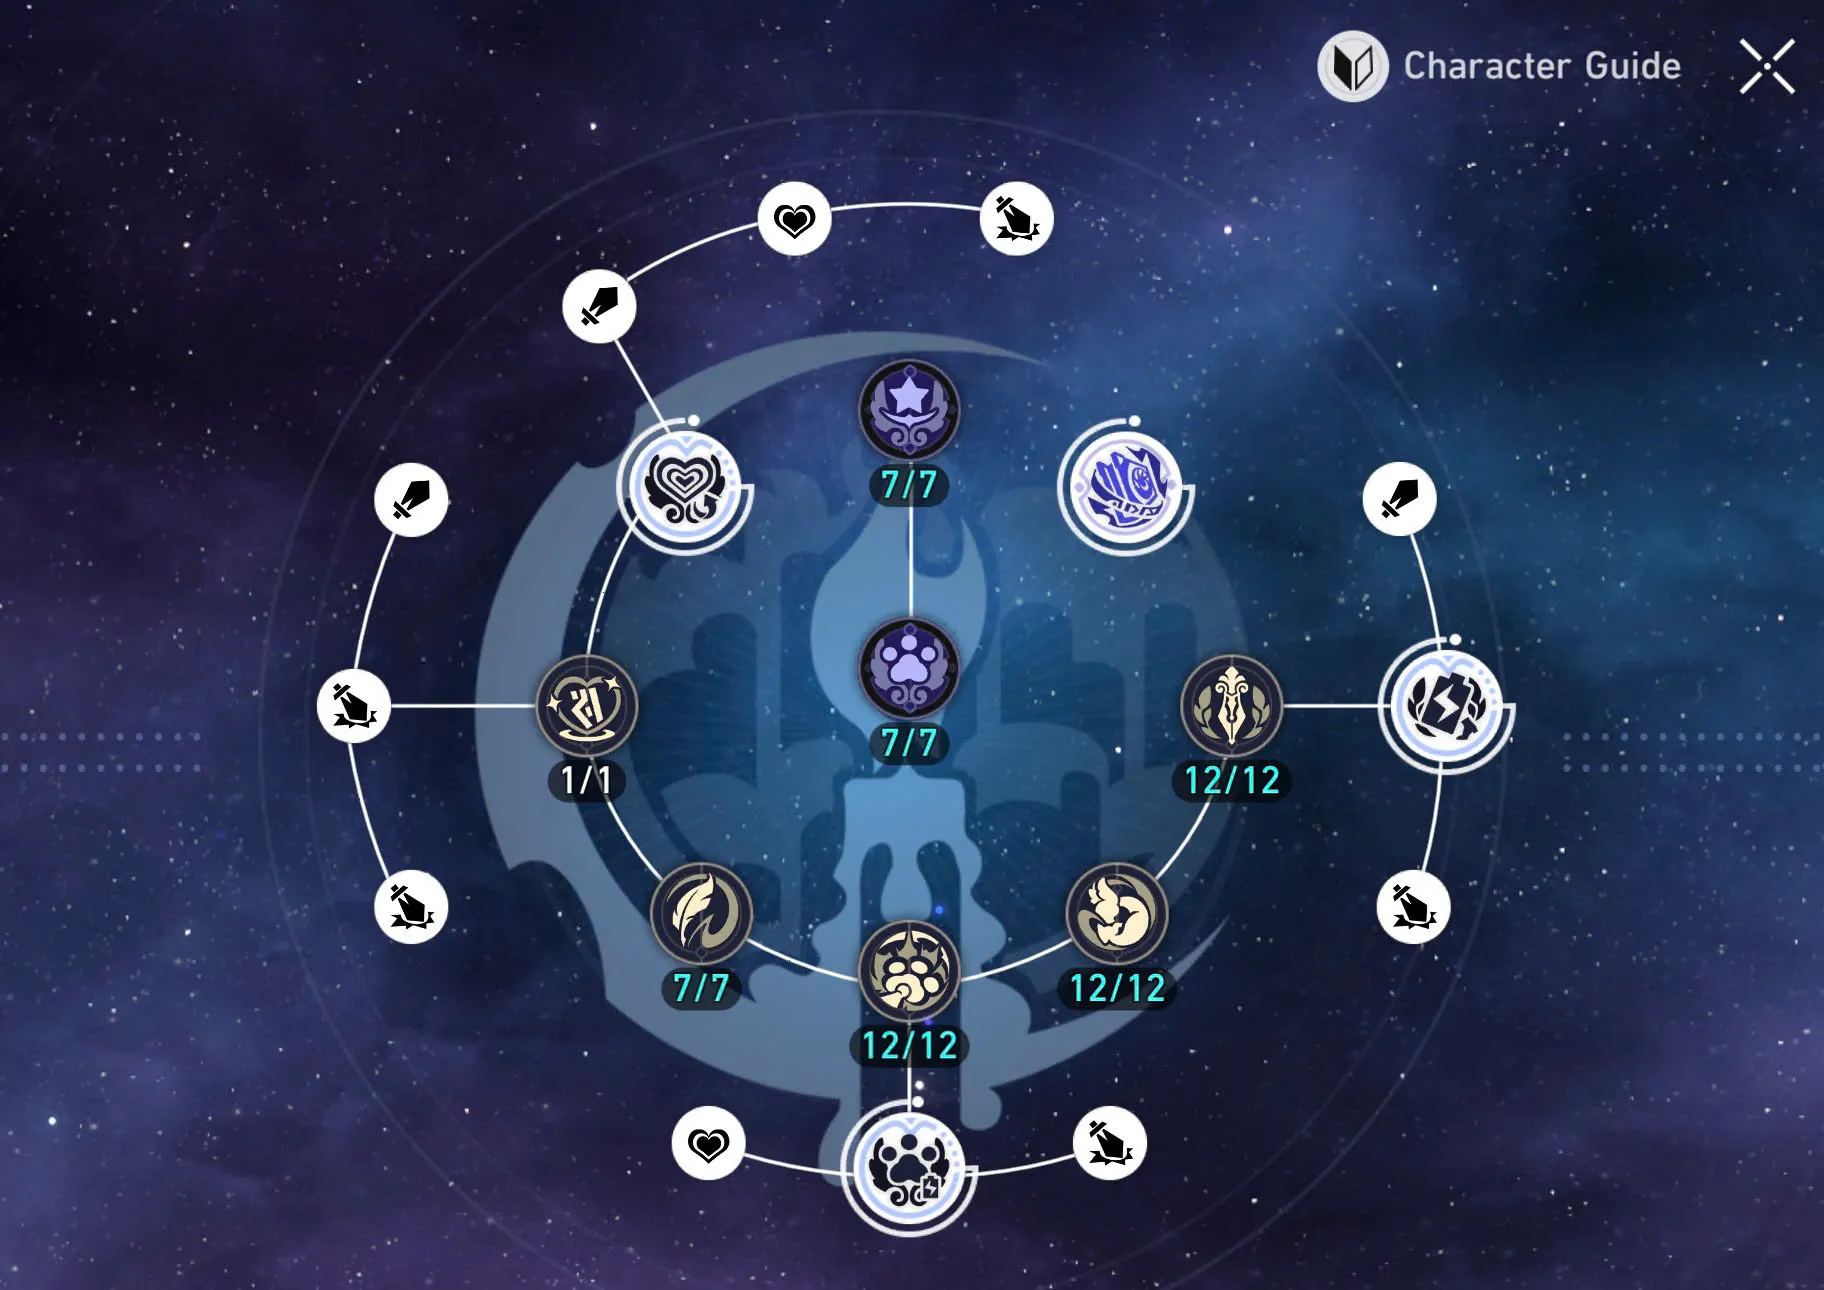
Rather than upgrading everything at the same pace, consider which abilities are most important to the character’s actual role. A damage dealer may gain the most from the abilities responsible for their primary damage, while a support may benefit more from improving the ability that provides their main buff or utility.
Early-game upgrade priority order
When several upgrade systems become available at the same time, it can be difficult to decide where your resources will have the greatest impact. The following order is a useful default priority for beginners, although it should not be treated as a strict rule because the value of each upgrade can vary depending on the character, role, and team composition.
Character level and Ascension
Keep the characters in your main team close to their current progression limit, completing Ascension when needed so they can continue gaining levels and accessing further upgrades.
Light Cone level
Once your main characters are adequately levelled, keep the Light Cones they actively use at a reasonable level as well. Since Light Cones provide additional stats alongside their passive Abilities, upgrading the equipment used by your main team can provide a straightforward improvement without requiring detailed build optimisation.
Key Traces
After the basic character and Light Cone progression is covered, invest in the Traces that have the greatest impact on each character’s role. A damage dealer may prioritise the abilities responsible for their main source of damage, while a support or sustain character may gain more value from the Trace that provides their most important buff, debuff, healing, shielding, or utility.
You do not need to upgrade every Trace equally, especially when resources are limited.
Useful Relic main stats
Once your core character progression is in good shape, equip Relics and Planar Ornaments with useful main stats for the characters you are actively using. At this stage, the goal is simply to give your team enough stats to clear the content you are currently playing rather than searching for a perfect set.
Relic optimisation
Detailed Relic optimisation should come later, when your characters already have their basic progression in place and when equipment becomes a more meaningful source of additional improvement. This is when stats such as SPD, CRIT Rate, CRIT DMG, Break Effect, or Effect Hit Rate can become more important depending on the character and team. A useful way to remember the general order is:
Character Level & Ascension → Light Cone Level → Key Traces → Useful Relic Stats → Relic Optimisation
This is a general guideline rather than a fixed rule. If a particular Trace provides a major upgrade to your character’s core ability, for example, it can be worth prioritising that Trace before investing heavily in another system.
What are Eidolons?
Eidolons are additional character upgrades obtained by acquiring duplicate copies of the same character.
Depending on the character, an Eidolon can provide anything from a relatively modest improvement to a substantial enhancement of a particular mechanic. Their value therefore varies considerably between characters, but duplicate copies are not necessary for a new account to function effectively.
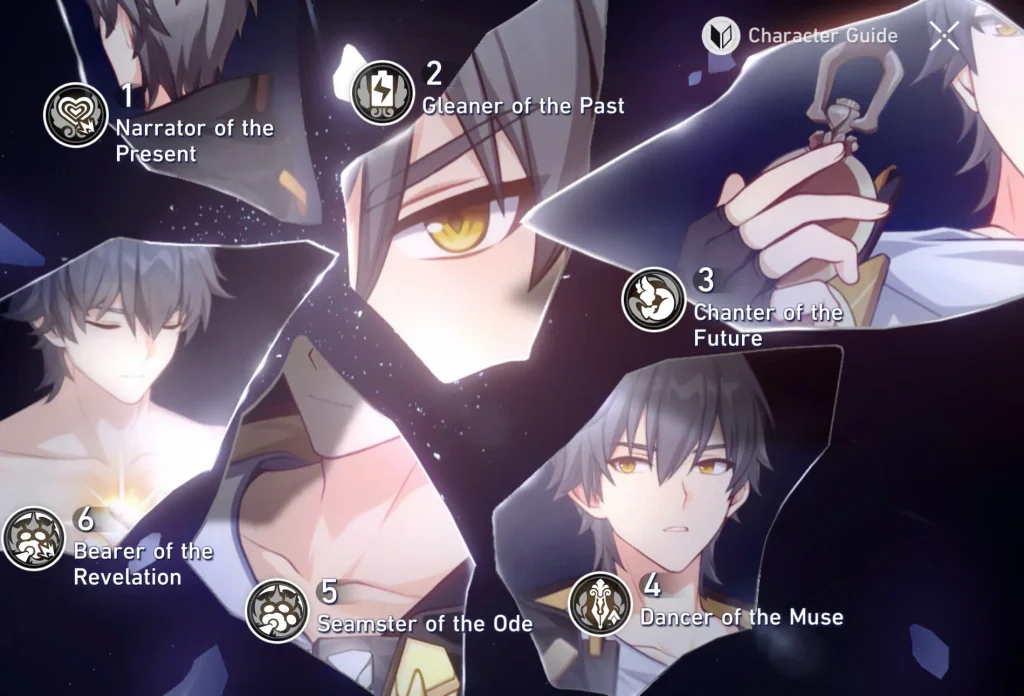
For most beginners, obtaining additional characters can provide more roster flexibility than deliberately chasing multiple copies of the same character, particularly while you are still discovering which roles and playstyles you enjoy.
Light Cones and Relics
Equipment becomes increasingly important as your account develops, with Light Cones, Relics, and Planar Ornaments forming the main equipment systems you will encounter.
Light Cones
A Light Cone is a character’s main equipment item, providing additional stats and a passive Ability that can strengthen the character in different ways. The Light Cone’s Path matters because a character can equip a Light Cone even when its Path doesn’t match, but the Light Cone’s Ability activates only when its Path matches the character’s Path.
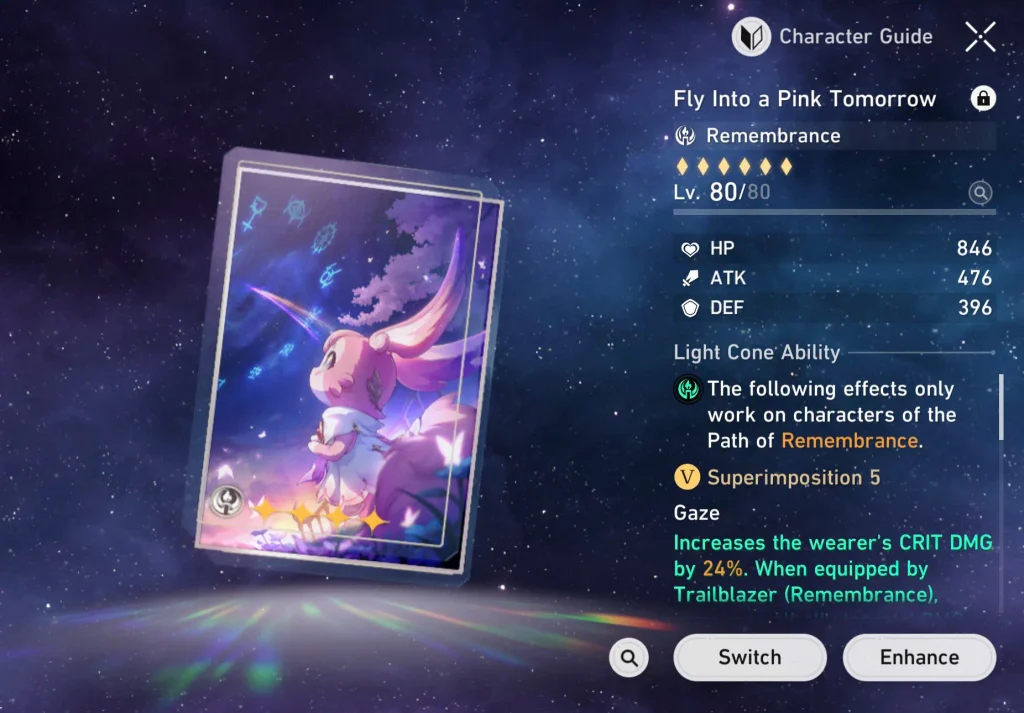
A mismatched Light Cone can therefore still provide its basic stats, but you lose the benefit of its passive Ability. This makes Path compatibility more important than simply choosing the highest-rarity Light Cone available.
Five-star Light Cones can provide excellent performance, especially when their effects are designed around a specific character or playstyle, although they are not required for normal early progression. Useful four-star options can perform perfectly well while your account is developing.
For a new account, it is generally more practical to concentrate your Light Cones on the characters you actively use rather than investing heavily in equipment for a large number of inactive characters.
Relics and Planar Ornaments
Relics and Planar Ornaments provide additional stats and set effects, making them one of the deepest character-building systems in HSR.
During the early game, equipment optimisation should remain relatively straightforward. Reasonable main stats can provide enough value to keep your characters progressing, while spending large amounts of resources searching for perfect substats is usually inefficient when your builds are still developing.
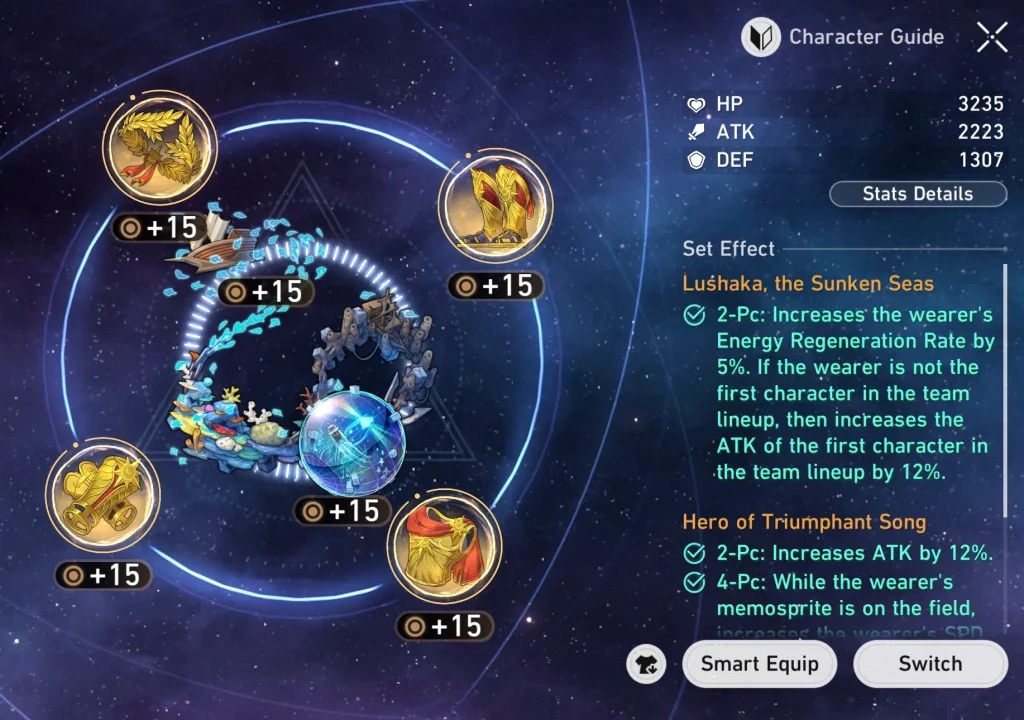
Relics can therefore be approached in two stages: useful equipment for progression first, followed by more specialised builds once your characters and teams have clearer stat requirements.
The important distinction is therefore between progression equipment and optimised equipment: early Relics are primarily there to help you clear content, whereas advanced Relic builds are used to fine-tune a character once the rest of their progression is already in place.
Stellar Jade and Warp
Stellar Jade is one of the game’s most valuable currencies because it can be exchanged for Warp passes, making it an important resource for players who want to expand their roster.
Because new banners are regularly available, it can be tempting to spend Stellar Jade simply because a character is currently featured. A more deliberate approach is to consider whether you actually want the character, what role they would play in your roster, and whether their mechanics fit the teams or playstyles you are interested in.
There is also no requirement to collect every powerful character. Since HSR is primarily a PvE game, personal preference can reasonably be part of your pulling strategy alongside account strength and team needs.
Should you reroll?
Rerolling means creating multiple new accounts until you obtain a desirable starting result. Some players use this approach to target a preferred starting character, while others skip it because the process can make the opening hours more repetitive. For most beginners, rerolling is best treated as an optional preference rather than a requirement for building a strong account.
How to spend Trailblaze Power as a beginner
Trailblaze Power is a regenerating resource used to obtain many of the materials required for character progression.
The normal Trailblaze Power cap is 300, and once your regular Trailblaze Power reaches the cap, additional regeneration can be stored as Reserved Trailblaze Power, which can accumulate up to 2,400. During early progression, practical targets include Character EXP, Character Ascension materials, Credits, Light Cone materials, and important Trace materials, depending on which upgrade your active characters need next.
A useful way to decide where to spend Trailblaze Power is to identify the next meaningful upgrade for a character you actively use and then obtain the material required for that upgrade, rather than farming resources without a clear purpose.
Common beginner mistakes
Understanding the basic systems is only part of learning Honkai: Star Rail. Beginners can also lose resources or make combat more difficult by overlooking a few common habits, especially when building teams and deciding where to invest early resources.
Stopping at the level cap
Reaching a character’s current level cap does not mean their progression is finished. If the character can no longer gain levels, check whether Ascension is available before spending resources elsewhere.
Ignoring skill point economy
It is easy to treat every turn as an opportunity to use a Skill, especially when the Skill is more powerful than the character’s Basic ATK. However, if several characters constantly consume Skill Points, the team can run out of them at an inconvenient moment. Learning which characters can comfortably use Basic ATKs during certain turns will help keep your rotation stable.
Using the wrong Light Cone path
A higher-rarity Light Cone is not automatically better if its passive Ability cannot be activated. Before equipping a Light Cone, check its Path and make sure it matches the character if you want to benefit from its full effect.
Building around rarity alone
Five-star characters can be extremely valuable, but rarity alone does not determine whether a character is the right choice for a particular team. A character’s mechanics, role, resource requirements, and compatibility with the rest of the roster can all influence their practical value.
Ignoring team synergy
Choosing characters individually without considering how their abilities interact can create awkward rotations or leave important team functions unsupported. Before committing to a composition, check whether its characters can work toward the same overall game plan.
What comes after the early game?
Once your main team can comfortably handle the content you are currently playing, account development can gradually shift from basic progression toward expansion and optimisation.
One natural long-term goal is building a second team, particularly if you want to challenge content that requires multiple teams. At this stage, you can also begin paying closer attention to mechanics such as SPD tuning, Energy management, and character-specific rotations, while refining equipment according to each team’s requirements.
Different characters may also encourage you to build around particular mechanics rather than the general damage-dealer, support, and sustain structure used when learning the game.
The deeper systems become more relevant once your core team is established, giving you room to improve specific interactions rather than simply increasing every upgrade at once.
Beginner FAQ
Should I use the beginner Warp?
The Departure Warp is the game’s beginner Warp and guarantees a 5-star character within 50 Warps, making it a useful way to establish an early roster.
Should I spend Stellar Jade on Light Cone banners?
For most new accounts, characters generally provide more roster flexibility than Light Cones. Light Cone banners become more appealing once you already have characters you want to optimise.
Do I need to reroll my account?
No. Rerolling is completely optional, so you can either optimise your starting roster or begin the story immediately.
Can I use free characters throughout the early game?
Yes. Accessible characters can form a functional early roster, so limited five-star characters are not required for normal early progression.
Do I need to follow the current meta?
Not necessarily. Meta recommendations become more relevant for difficult content, while story progression and ordinary content can be approached with characters you enjoy and teams that work well together.
When should I build a second team?
A second team becomes more relevant when you begin tackling content that requires multiple teams. Until then, developing one reliable core team is generally simpler.
Final beginner tips
A strong early account does not require perfect characters, highly optimised Relics, or a large collection of five-star units. What matters most is understanding what your active characters contribute and making sure your resources support the teams you actually use.
As you progress further, advanced systems such as Relic optimisation, SPD tuning, and character-specific rotations will give you more ways to refine those teams. By that point, you will already have the foundation needed to understand why those optimisations matter.
Take your time, experiment with different characters, and let your account develop alongside your understanding of the game. That approach will make the transition from early progression to more demanding content much smoother.
Latest Updates
- Grow a Garden 2 codes (September 2026) and how to redeem
- Grow a Garden codes (September 2026): all active codes and rewards
- Wuthering Waves codes (September 2026): all active codes and rewards
- Zenless Zone Zero 3.3 leaks: Phoenix Reffaella & Severian Lowell
- Valorant September to October 2026: Events, updates, Champions Shanghai & More